
Sam Hallas' Website
I want to discuss how I deal with two types of photograph: ordinary prints from a film camera and newspaper or magazine photographs. My contention is that it is better to fix problems with images at the scanning stage rather than afterwards. This will leave more detail in the resulting scan to allow further processing.
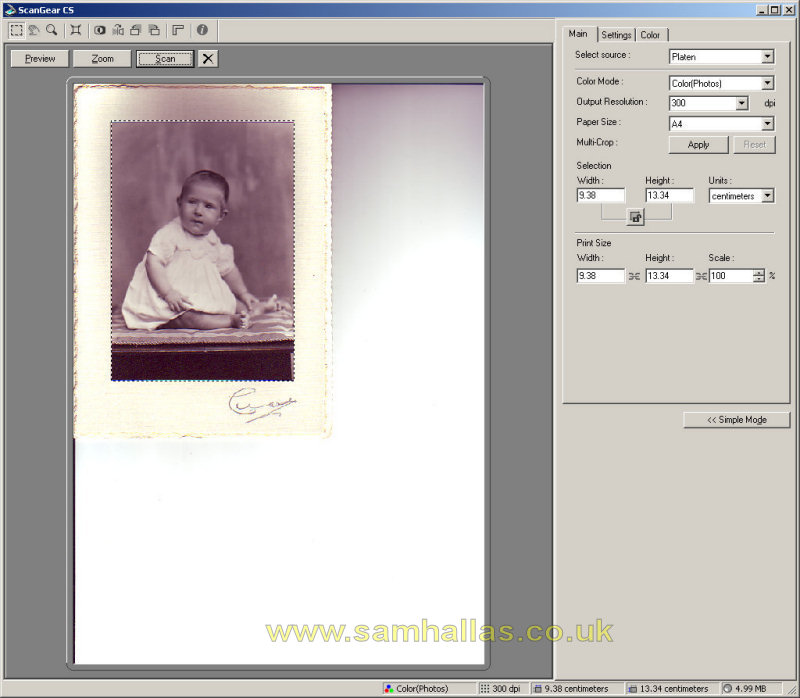
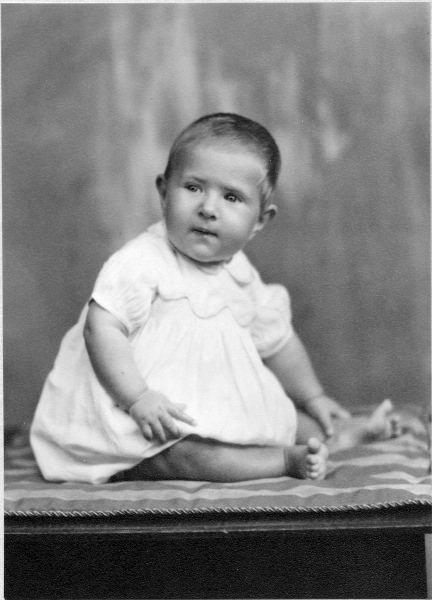
I'll start with ordinary photoprints - the sort you get from the chemists after taking a film in to be developed. Let's take a 60-year old snapshot from the family album and make a preview scan. It looks like this. [You can get a larger view of most images by clicking on the image. Use the Back button to return.]
I've already selected the area I want to scan which is outlined by a dotted line. You'll notice that I'm still using the advanced interface because it has controls that I need to adjust the scanned image.
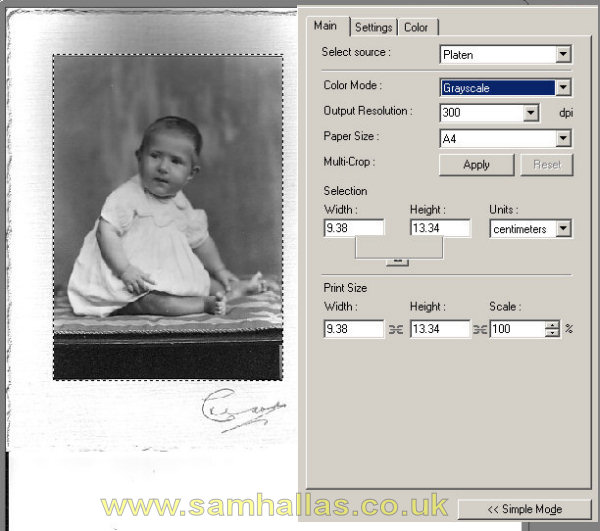
Because this is a black and white photo I've changed the colour mode to greyscale. The preview image changes accordingly.
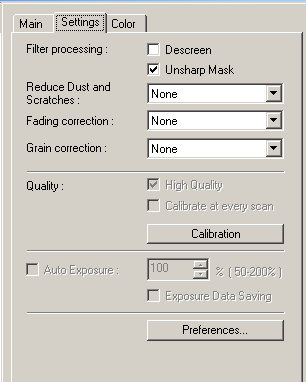
Next I move onto the Settings tab and turn on the Unsharp Mask option. This has the effect of sharpening the image to compensate for any loss of focus if the photo is not totally flat on the scanner glass. I've left the other options off. I assume that your scanner has similar controls although not necessarily in the same layout.
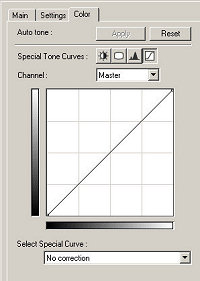
Next I'll go onto the Color tab which has controls for (from left to right) brightness/ contrast, gamma, histogram and curves.
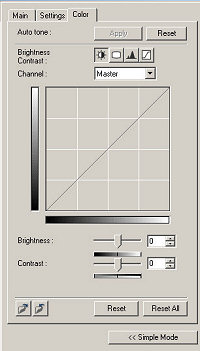
If you've worked with photo editor programs or own a more advanced digital camera, you'll know what these are for. For this photograph I'm going to make adjustments to the histogram. The button to show the histogram is third one along with what look like mountains on it.
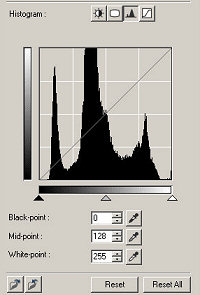
I'll try to explain what a histogram shows if you haven't had occasion to use one before. Right is the histogram for the preview scan of the baby picture above. The horizontal scale shows shades of grey from black to white, as shown on the bar at the bottom. The height of the graph at any point shows how much of that tone of grey is in the picture.
There is quite a lot of mid-grey tone in the picture, a fair amount of dark tone, but less bright tone. Importantly notice that there is no pure black and no pure white. This means that if I scan the picture now I will only have a restricted range of grey shades in my scanned image. I find this is quite a common problem with photographs and it's always worthwhile adjusting the histogram to get the best scanned image. It only gets worse if the photo has faded over the years and the background has become yellow or even brown.
The little triangles at the bottom allow me to adjust the scanner to spread the range of tones to fill the entire width of the histogram in the final scan. By clicking and dragging the black triangle to the right and the white triangle to the left I can correct the lack of tonal range in my photo. Another way of setting the black and white points is to click on the droppers marked 'black point', 'mid-point' or 'white point' and then click on an area in the preview image that should be black, mid-grey or white.
I drag the black triangle to be in line with the darkest tone in the photo and the white triangle to be in line with the lightest tone. On the left I've set the preview image next to the histogram so you can see the effect. The blacks are now darker and the whites brighter. It only remains to perform a final scan and that image is ready to use.
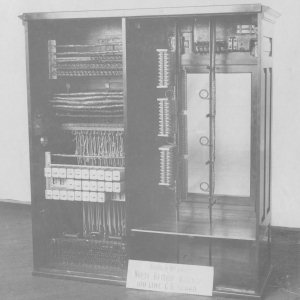
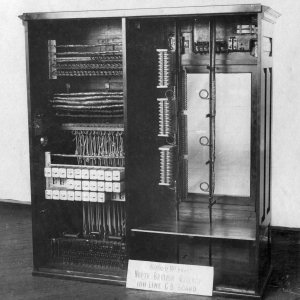
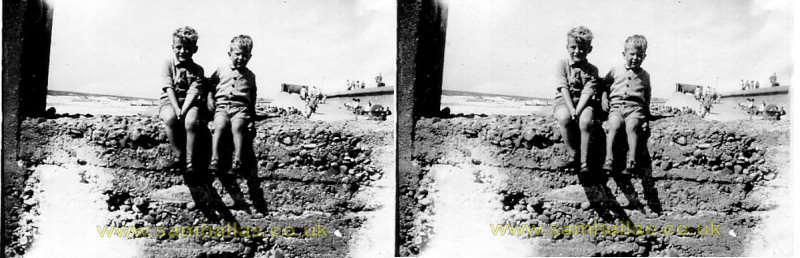
Here's a more extreme example of what a histogram adjustment can do for an image lacking in contrast.
I was going to refer you to one of the many tutorials on curves on the internet. Unfortunately they are so heavily reliant on Photoshop® and adjustment layers that they are useless for reference to the scanner.
The curves screen is accessed from the far right button on the Color tab. It seems misleading at first as the graph is a straight line and not a curve. It depicts how the grey tones are translated from the scanner to the output image. Black is at the left and bottom and white at the right and top. Without any adjustment the tones are translated exactly as they appear so the 'curve' is a straight line.
The straight line behaves like a rubber band. If you click on it and drag it stretches. Unlike a rubber band it stays where it is when you release the mouse button. Sliding the middle of the line upwards lightens the mid tones and sliding it downwards darkens them.
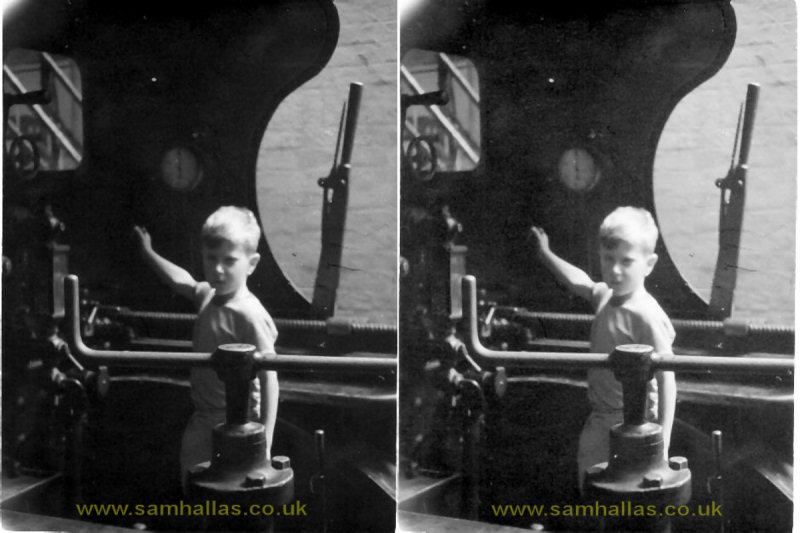
The picture above was rather muddy. By sliding the curve upwards detail is brought into the shadows.
You can click more than one adjustment point on the line. Here I used an S-shaped curve to improve a highly contrasty image.
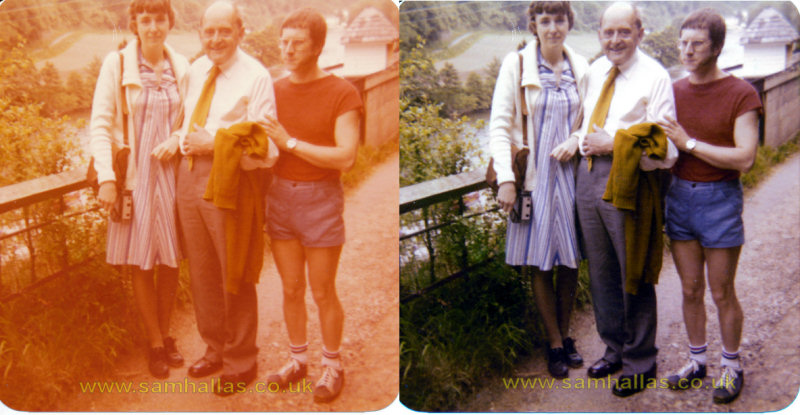
Oldish colour prints tend to develop a colour cast - quite often it's red like the one below left. You can use the curves screen to help fix this. Instead of working on the Master curve, you work on the Red curve and drag it downwards. This also darkens the image so you need to go back to the Master curve and drag it upwards a bit. The result can be quite pleasing. You can also use the White Point dropper to correct colour balance problems, though it relies on there being a suitable area of white or grey in the image.
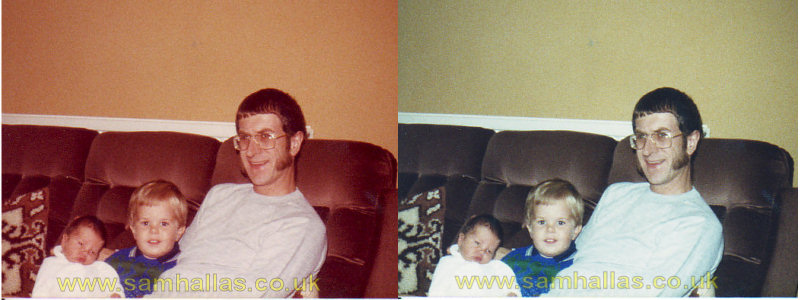
My big scanner has an option called 'Fading Correction' which performs a similar function with a simple click. It has four settings: None, Low, Medium, and High. Here's a badly faded original with an almost magic transformation back to its proper colour.
Next I'll go onto discuss the problems with newspaper and magazine photos in
Document Repository